
Working your tickets
- For
- Inspectors
- Where
- Phone app
- Time to read
- 4 minutes
A ticket is the to-do list that comes out of a problem. When an inspection finds failures, KleanProof bundles all of them into one ticket with a number like TKT-0034, and each failed task inside it is called a deficiency. A ticket raised by hand usually holds a single deficiency. The ticket closes on its own once every deficiency inside it is fixed and approved.
Each ticket gets a due date from its priority. Urgent is due in about two hours, High in a day, Normal in two days and Low in five.
Step by step
1Open the Tickets tab
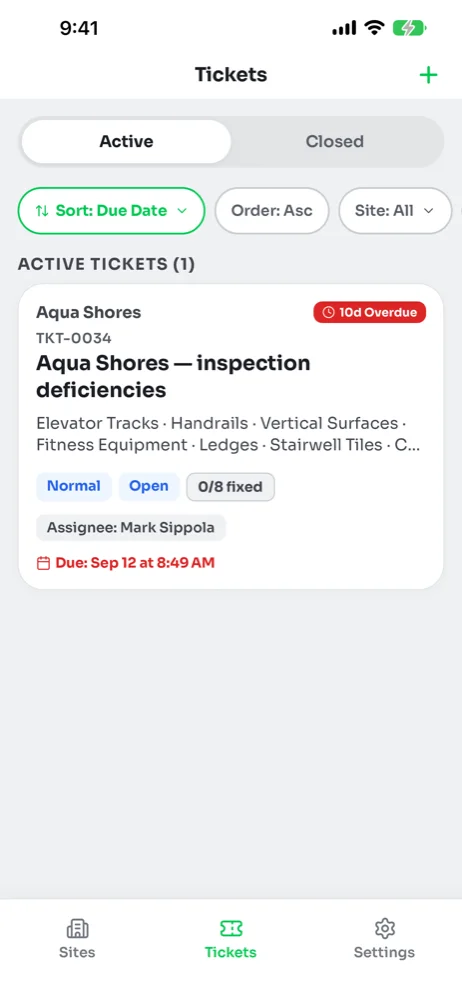
The Tickets tab lists the tickets assigned to you and the ones you reported. Supervisors and admins see every ticket in the workspace. Active holds everything still open and Closed keeps the history.
Each card shows the site, the ticket number, the deficiencies inside it, the priority, the status and the due date. A red Overdue badge means the due date has passed, and a count like 0/8 fixed tells you how far along a bundled ticket is.
The dot on the Tickets tab icon tells you something needs you. A pulsing red dot means a ticket was assigned to you and you have not acknowledged it yet. A solid red dot means someone posted in a ticket's discussion.
2Sort and filter the list
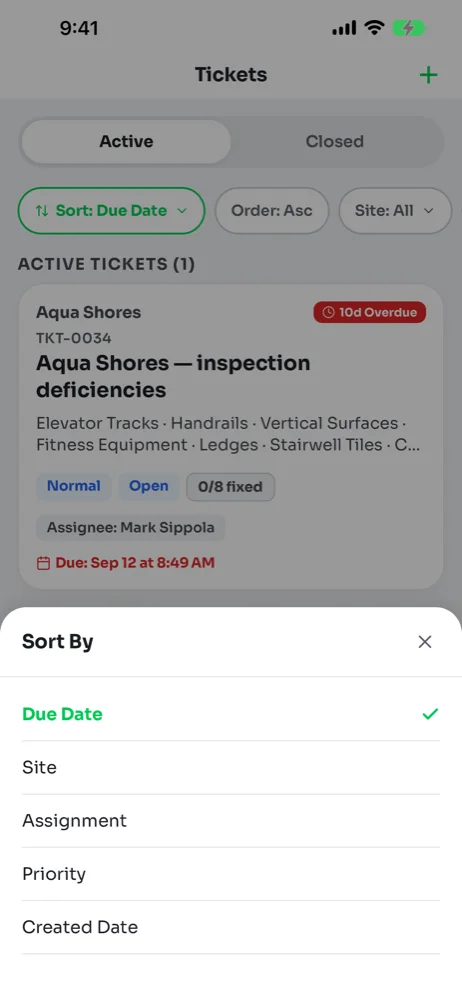
The pills under Active and Closed sort and narrow the list. Sort by due date, site, priority or created date, flip the order, or show one site, one priority or one source at a time. Clear Filters appears once anything is changed, and it puts the list back to normal.
3Acknowledge the ticket
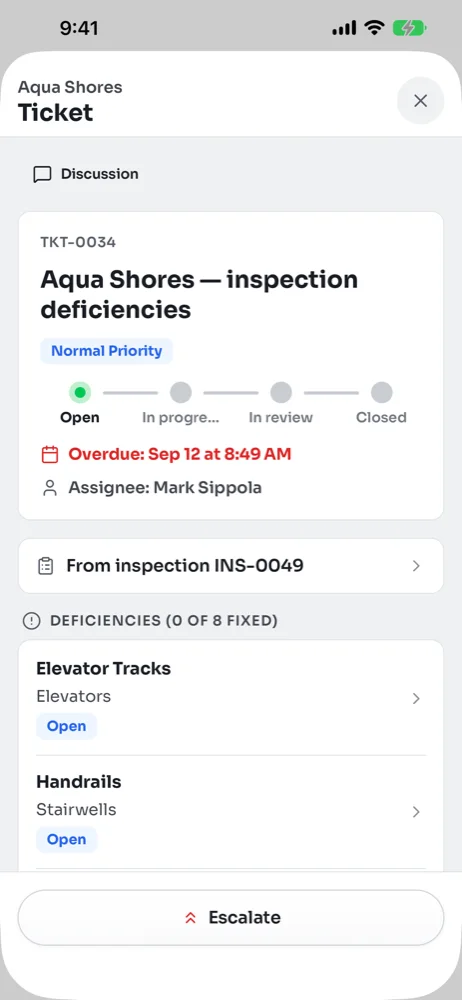
Tap a card to open the ticket. The progress line across the top runs Open, In progress, In review, Closed. Below it you see the due date, who it is assigned to, a link to the inspection it came from, and the list of deficiencies with how many are fixed.
If the ticket is yours, tap Acknowledge Ticket first. It tells your team you own the work and moves every open deficiency to In progress. Acknowledging works without signal and syncs later.
An urgent or escalated ticket that you have not acknowledged takes over the screen when you open the app, under the heading Needs your acknowledgment. Tap Acknowledge on each card, or Not now to deal with it later.
4Open a deficiency and read what failed
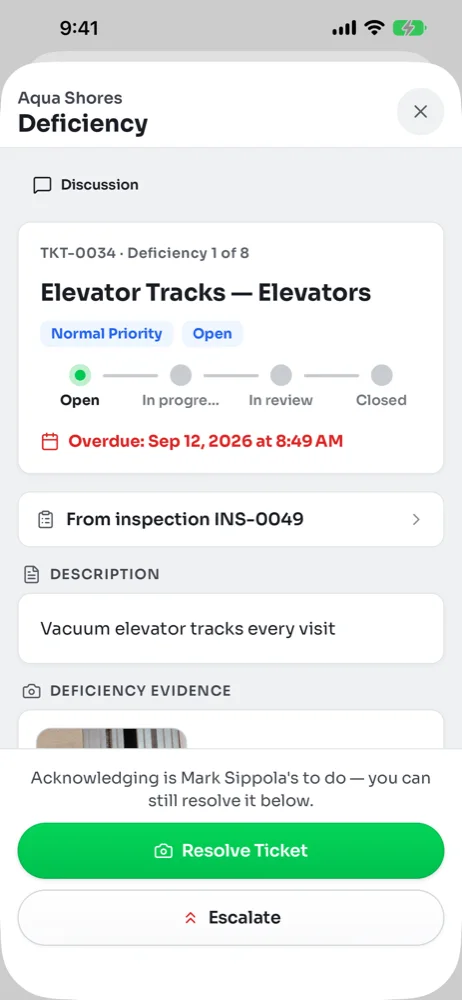
Tap a deficiency in the list to see it on its own. Description carries the inspector's note and Deficiency Evidence holds the photos taken on the walk. Tap a photo to zoom in. The Discussion button at the top opens the conversation for the whole ticket, so questions about the work stay with it.
5Fix it and send back proof
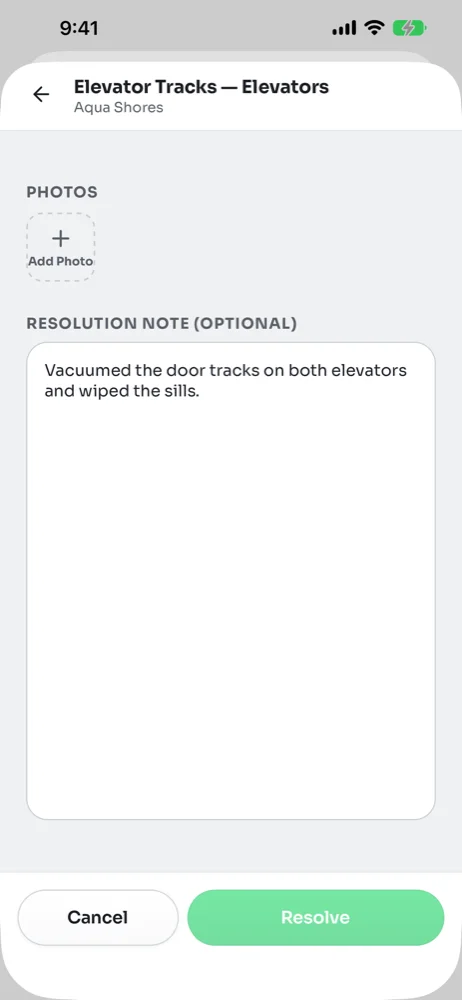
Once the work is done, tap Resolve Ticket. The camera opens so you can photograph the fixed spot. You can add up to five photos, and the button in the bottom corner of the camera lets you pick from your photo library instead. Add a short note on what you did if it helps, then tap Resolve.
Cleaning tickets need at least one photo, so Resolve stays greyed out until you add one. Library photos taken before the ticket was raised are refused, because they cannot show the fix. Tickets filed under a non-inspection category, such as building repairs, can be resolved without one.
Resolving works offline. The photos wait on the phone and upload once you have signal.
6Wait for the review
After you resolve, the deficiency moves to Awaiting Review and a supervisor checks your proof. When they approve it, the deficiency closes. When the last one closes, the whole ticket closes. If you are a supervisor or admin, or the site is set to auto-approve, your fix closes straight away.
If the supervisor is not happy with the fix, it comes back to you. The deficiency shows a Resolution Rejected by Supervisor banner with their reason at the top. Fix what they asked for and resolve it again.